Today I did the last remaining job of the Complaint Management System Project, and that was the issue of Reporting. Few days earlier I got stuck regarding choosing the proper reporting tool. But then mind moved on to the my oldy friend ODTPHP and ya it's true, old is gold it would never cheat. ODTPHP made me happy and did what I wanted. But a bit stress on my mind was also put upon by me as I was not able to find any suitable o/p from googling. The feature that I was looking for in ODTPHP was that I had to insert a separate segment in a cell of every row of column. In short I need to do this:-
$odf= new odf("report.php");
$article= $odf->setSegment('complaint');
while(some cond){
$article->dispatch->setVars();
}
Wednesday, August 17, 2011

Thursday, August 11, 2011
Installing Django on ubuntu
Hello Visitors, A Post after a long long time, currently I am getting my training at NIC Barnala for my degree course. I had done a project in php for NIC now I got bored from it and wanna shift to Some other framework or Scripting language. This time I selected Django framework based on python. Below are the steps to install it. The Project is a surprise :-
Install server software
Install Apache, Mod_Python, MySQL and MySQLdb. MySQLdb is the database bindings for MySQL. Django also supports PostgreSQL, Oracle and SQLite. If you choose to use a different database server, be sure to install the appropriate Python bindings.
Python won’t recognize Django unless it is installed in the “site-packages” directory, so instead we just create a symbolic link to the source code in our home directory. Run the first command to find out the path to your “site-packages” directory. Then use it in the second command, in place of “YOUR-DIR”. Lastly, copy the django-admin.py file into /usr/local/bin so that we don’t have to qualify the command with the full path to the file.
cd ~/
Edit the myproject/settings.py file and change the following sections:
Edit the URL configuration file and uncomment the admin line. This will allow you to access the admin section later.
In Apache2 on Ubuntu, changes to the Apache configuration are done to the/etc/apache2/httpd.conf file. We are going to configure mod_python to handle requests for the root of the site and give control to Django. However, Django doesn’t serve media files itself; it usually expects you to have a different webserver serving these files. In our case though, we want Apache to handle it, so we need to turn off mod_python for some parts of the site. You will also need to do this if you have any other folders or scripts that you want excluded from Django’s control. In my example, I have phpMyAdmin, my media folders and any URL that ends with .jpg, .gif or .png be excluded.
When deploying Django sites on mod_python, you’ll need to restart Apache each time you make changes to your Python code. However, since I’m using this as a development server, I discovered a way to avoid the hassle of having to restart the server each time. At the top of my httpd.conf, I have the line MaxRequestsPerChild 1. This forces Apache to reload everything for each request. Do not use this setting on a production server!
The only other lines you need to change are in the firstblock. Change “myproject.settings”, if you are using a different name for your project. Then below that be sure to change the PythonPath to point to the django_projects folder in your home directory.
You can now view your new Django website by visiting the root of the website you installed it at – http://yourdomain.com/ . You should see a Page not Found (404) error message generated by Django. Congratulations! Everything is working. You can also go to http://yourdomain.com/admin/ and log in with the superuser you created earlier.
Now that you’re done with the easy part, all thats left is to get started writing your Django apps. There is a tutorial on the official Django website that will walk you through creating an application.
sudo apt-get install apache2 libapache2-mod-python

sudo apt-get install mysql-server python-mysqldb
Install the Django source code
At this point you have a couple of options. You could “apt-get install” a Django package, install an official release or install the development version. I chose to install the development version because it contains the latest bug fixes and features. We’ll be checking out the latest version from its Subversion repository. You’ll want to be in your home directory when you do this.cd ~/
svn co http://code.djangoproject.com/svn/django/trunk/ django_src
python -c "from distutils.sysconfig import get_python_lib; print get_python_lib()"


ln -s `pwd`/django_src/django YOUR-DIR/django


sudo cp ~/django_src/django/bin/django-admin.py /usr/local/bin
Create Django’s directories
Next we need to create some directories that Django will use. Once again, create these under your home directory.cd ~/
mkdir django_projects


mkdir django_templates


mkdir media
Then we need to create some symbolic links in your webroot. The default webroot for an Apache2 installation on Ubuntu is /var/www. We are going to create a link to the media folder in your home directory, and a link to the admin_media folder which is provided in the Django source code.
cd /var/www


sudo ln -s  ~/media media


sudo ln -s ~/django_src/django/contrib/admin/media admin_media
Create a Django project
Move into your Django projects directory that we just created. We will be starting a new project using Django’s command line utility. This will give us a basic directory structure and the necessary configuration files. In my example I named the project “myproject.” Feel free to choose any name, as long as it does not conflict with any built-in Python or Django components. In particular, this means you should avoid using names like django (which will conflict with Django itself) or site (which conflicts with a built-in Python package).cd ~/django_projects django-admin.py startproject myproject
- Uncomment and change the ADMINS settings:-
6

7

8

9

10
ADMINS = ( ('Your Name', 'your_email@domain.com'), ) - Enter your database settings. You will need your database, username and password. Most likely your database server is running on the same server, so leave DATABASE_HOST blank.
12

13

14

15

16

17

18

19

20

21

22
DATABASE_ENGINE = 'mysql'           # 'postgresql_psycopg2', 'postgresql', 'mysql', 'sqlite3' or 'oracle'.


DATABASE_NAME = 'django_databae'             # Or path to database file if using sqlite3.


DATABASE_USER = 'you'             # Not used with sqlite3.


DATABASE_PASSWORD = 'yourpassword'         # Not used with sqlite3.


DATABASE_HOST = ''             # Set to empty string for localhost. Not used with sqlite3.


DATABASE_PORT = ''             # Set to empty string for default. Not used with sqlite3.
- Change your timezone if necesary.
19

20

21

22

23

24

25

26

27

28

29
# Local time zone for this installation. Choices can be found here:


# http://www.postgresql.org/docs/8.1/static/datetime-keywords.html#DATETIME-TIMEZONE-SET-TABLE


# although not all variations may be possible on all operating systems.


# If running in a Windows environment this must be set to the same as your


# system time zone.


TIME_ZONE = 'America/Chicago'
- Point Django at the template directory we created.
69

70

71

72

73

74

75
TEMPLATE_DIRS = (


"/home/YOUR_USERNAME/django_templates"


   # Put strings here, like "/home/html/django_templates" or "C:/www/django/templates".


)
- Do the same thing for the media url and directory we created earlier.
36

37

38

39

40

41

42

43

44

45

46
# Absolute path to the directory that holds media.


# Example: "/home/media/media.lawrence.com/"


MEDIA_ROOT = '/home/YOUR_USERNAME/media/'# URL that handles the media served from MEDIA_ROOT. Make sure to use a


# trailing slash if there is a path component (optional in other cases).


# Examples: "http://media.lawrence.com", "http://example.com/media/"


MEDIA_URL = 'http://yourdomain.com/media/'
- Set the admin media directory that we created in your webroot
45

46

47

48

49

50

51
# URL prefix for admin media -- CSS, JavaScript and images. Make sure to use a


# trailing slash.


# Examples: "http://foo.com/media/", "/media/".


ADMIN_MEDIA_PREFIX = '/admin_media/'
- And finally, add the admin application to your install applications
76

77

78

79

80

81

82

83

84

85

86

87

88
INSTALLED_APPS = (


   'django.contrib.auth',


   'django.contrib.contenttypes',


   'django.contrib.sessions',


   'django.contrib.sites',


   'django.contrib.admin',


)
django-admin.py syncdb
Edit the URL configuration file and uncomment the admin line. This will allow you to access the admin section later.
nano ~/django_projects/myproject/urls.py
1 2 3 | # Uncomment this for admin:
(r'^admin/', include('django.contrib.admin.urls')),
|
Configure Apache and mod_python
In Apache2 on Ubuntu, changes to the Apache configuration are done to the/etc/apache2/httpd.conf file. We are going to configure mod_python to handle requests for the root of the site and give control to Django. However, Django doesn’t serve media files itself; it usually expects you to have a different webserver serving these files. In our case though, we want Apache to handle it, so we need to turn off mod_python for some parts of the site. You will also need to do this if you have any other folders or scripts that you want excluded from Django’s control. In my example, I have phpMyAdmin, my media folders and any URL that ends with .jpg, .gif or .png be excluded.
When deploying Django sites on mod_python, you’ll need to restart Apache each time you make changes to your Python code. However, since I’m using this as a development server, I discovered a way to avoid the hassle of having to restart the server each time. At the top of my httpd.conf, I have the line MaxRequestsPerChild 1. This forces Apache to reload everything for each request. Do not use this setting on a production server!
The only other lines you need to change are in the firstblock. Change “myproject.settings”, if you are using a different name for your project. Then below that be sure to change the PythonPath to point to the django_projects folder in your home directory.
sudo nano /etc/apache2/httpd.conf
1 2 3 4 5 6 7 8 9 10 11 12 13 14 15 16 17 18 19 20 21 22 23 24 25 26 27 28 29 30 31 32 33 34 35 36 | MaxRequestsPerChild 1 SetHandler python-program PythonHandler django.core.handlers.modpython SetEnv DJANGO_SETTINGS_MODULE myproject.settings PythonPath "['/home/YOUR_USERNAME/django_projects'] + sys.path" SetHandler None SetHandler None SetHandler None SetHandler None |
Restart Apache
sudo /etc/init.d/apache2 restart
Now that you’re done with the easy part, all thats left is to get started writing your Django apps. There is a tutorial on the official Django website that will walk you through creating an application.
Monday, June 20, 2011
Making Bootable Window 7 USB from Linux
Few days earlier i got my window crashed and it started showing Boot MGR Missing. I needed a bootable window dvd. But acting as an add on to my unfortunate, DVD ROM also got ill. :P
That's why the only option was to make usb bootable. But i found so many tutorials regarding making bootable usb from windows only. From linux i found almost nothing. Then i found a useful tutorial. Here is it:-
Install ms-sys, if it is not in your repositories, get it here. and follow instruction there for installing.
Follow the following instruction:-
Create an NTFS filesystem:
Mount ISO and USB media:
Copy over all files:
Write Windows 7 MBR on the USB stick:
...and you're done.
That's why the only option was to make usb bootable. But i found so many tutorials regarding making bootable usb from windows only. From linux i found almost nothing. Then i found a useful tutorial. Here is it:-
Install ms-sys, if it is not in your repositories, get it here. and follow instruction there for installing.
Follow the following instruction:-
Create an NTFS filesystem:
# mkfs.ntfs -f /dev/sdb1Mount ISO and USB media:
# mount -o loop win7.iso /mnt/iso# mount /dev/sdb1 /mnt/usbCopy over all files:
# cp -r /mnt/iso/* /mnt/usb/Write Windows 7 MBR on the USB stick:
# ms-sys -7 /dev/sdb...and you're done.
Thursday, December 2, 2010
Enabling Home Based BSNL wifi on your Wifi Mobile Phones
Few Days Back I bought a new Samsung Wave 525 phone. It is having Wifi I got excited and without wasting any time I enabled its Wifi. My modem Wifi was detected and connected to but even then I was not able to access the Internet. This made me very upset and I started thinking that I wasted my money. After this I started searching the Internet regarding my problem. Earlier I was thinking that problem is due to some settings might not right in mobile phone. But I was wrong Configuration of modem was needed to setup. So I found a useful link that let you setup your modem according to your mobile and then you will be able to run internet simultaneously on laptop, mobile & P.C.
I am having two type of Modems at two different places (one at my home in Ludhiana and another one at Barnala)
Firstly I ll show you how to setup BSNL ZTE Modem:-
Setting up your Computers IP:-
Please make sure to set your IP, Subnet and Gateway along with DNS Server as according:-
- I.P. = 192.168.1.10
- Subnet Mask = 255.255.255.0
- Gateway = 192.168.1.1
- Preffered DNS Server = 61.0.0.5
- Alternate DNS Server = 61.1.96.69 and 61.1.96.71
Making Wireless Connection Secure:-
- First login to your DSL Router setup at http://192.168.1.1
- Then on Left Panel Go to Wireless->Security
- Let SSID value unchanged.
- Select Network Authentication= WPA-PSK
- WPA Encryption= TKIP
- Save and Apply (Let Rest of values remain unchanged)
Setting Up LAN and WAN for Multiple Use:-
- Again Go to home page of http://192.168.1.1
- Select Advanced Setup from Left Option Panel
- You will se the very first connection setting named service= pppoe_0_0_35_1
- Click on Edit option corresponding to this service
- Put Port=0, VPI=0, VCI=0 (Rest not changed) then Click on Next
- Selct Connection type= PPPoE and Encapsulation mode= LLC/SNAP-BRIDGING. Then click on next
- Now enter the password and username which your ISP provided you. In PPPoE service name you can put anything as I am putting here PPPoE Service Name = dataone. Leave Rest of things unchanged. Click on Next
- Make a check on Enable NAT, Enable Firewall, Enable WAN Service. Click on Next
- Cross Check the values you put down and make changes if they have been inserted wrongly. At last Click on Save.
- After that Come to default page of http://192.168.1.1 and then Go to Management->Save/Reboot. Click on Save/Reboot. It will take around about 2 minutes to restart modem with newly configured settings and thats it. You are now able to run multiple PC on same connection.
Using Wireless Service:-
- Just On your Wifi in your Mobile or Laptop.
- Enter Passcode. Thats It.
If you are not having your Modem of the type I explained you can also check out following link for configuration of your Modem.
So check out the link and set your broadband modem and enjoy!!!!!!!!!!
http://www.calcutta.bsnl.co.in/dataoneinstall/menu.html
http://www.calcutta.bsnl.co.in/dataoneinstall/menu.html
Saturday, November 6, 2010
Go Programming Language
The Go programming language is an open source project to make programmers more productive. Go is expressive, concise, clean, and efficient. Its concurrency mechanisms make it easy to write programs that get the most out of multicore and networked machines, while its novel type system enables flexible and modular program construction. Go compiles quickly to machine code yet has the convenience of garbage collection and the power of run-time reflection. It's a fast, statically typed, compiled language that feels like a dynamically typed, interpreted language.
For Installation Direction Follow:-
Check this out too:-
Wednesday, September 29, 2010
eyeOS Translation Done
EyeOS-Cloud Computing
eyeOS is an open source web desktop following the cloud computing concept that leverages collaboration and communication among users. It is mainl
y written in PHP, XML, and JavaScript. It acts as a platform for web applications written using the eyeOS Toolkit. It includes a Desktop environment with 67 applications and system utilities. It is accessible by portable devices via its mobile front end.
eyeOS is browser based operating system based on cloud computing. It can do all that jobs which a real operating system can do. One can save his data and work on-line ad can access his a
ll the data from anywhere.
eyeOS is a desruptive Desktop entirely usable fro
m a web browser. It includes some office suite and and some collaboration applications, as well as a full framework to develop new web applications as they were web applications. Its Free and Open-source so you can host you own system, keeping all your data under your own control.
Website: http://www.eyeos.org/
eyeOS in Hindi
In eyeOS 2.0 its translations in different languages will also be available. I also have deployed it in our college. I made eyeOS avialable in our college serevr during my training. And after my training I got an email from Mr. Jordi Collel (Team Leader for Translation of eyeOS). So I came in the contact with the ey
eOS developers and translated all the eyeOS in Hindi. But this translation will be available in is next release. I alone did all the translation for it in Hindi Language. I also suggest my closest friend Parveen to translate it to Punjabi. He did a great job.
Here is the link to use eyeOS at college dummy server. http://202.164.53.116/eyeos/
Just Create a new user here and use it.
and to the translation http://translate.eyeos.org/.See the following image showing the translation done by me that will be available soon to everyone.
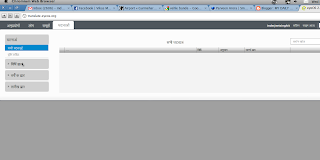 This is the task done by me. You can clearly see the contents being displayed.d in Hindi language. So soon you will be also able to view eyeOS in Hindi. It was quite atedious job but yaa interseting too.
Certificate from eyeOS Developers
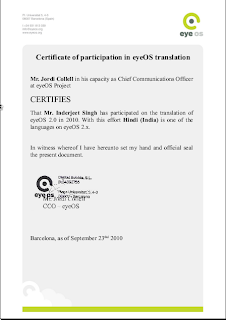
I also got the Certificate from the Developers of eyeOS from Barcelona(Spain) for doing this translation ion Punjabi and for taking part in opensource Project.Give a Look at my Certificate shown Below.
Friday, September 24, 2010
Barnala Map Ready At Open Street Map
I am feeling very happy to announce that Map of MY Home Town is finally ready (with just few detailing left) after two months. Indeed I took a quite much time but yet I was single person to map the whole districts with one of my student Sukhakashdeep Singh (+1 Inter arts) resident of Barnala too. He helped me a lot while collecting the GPS Data. Before I was doing my project when I made to see my Barnala Map by my mentor Dr. H.S. Rai, I was just shocked to see, not even boundary of city has been drawn earlier by anybody. From that very I decided that I will myself complete this map alone whether one should interested or not to help me. And Finally I got the result. You can clearly See What my Home town was earlier and What it is at present.

MY Home Town Before Mapping Done by me
 My Home town After Mapping Done by me :)
 So you can clearly see what a lot has been changed in Barnala Map at osm.org. Even the name of city was not displaying earlier. All thanx to my mentor Dr. H.S. Rai who gave me full support and also couraged me time to time. He provided me VGPS (for taking GPS data). And yes also to my Dad, he also supported me a lot. He covered the boundary with me in Car. Yet I am working on streets and all minor details along with some error correction if found. You can also take a look at iframe of my home town as shown below:
View Larger Map
MY Home Town Before Mapping Done by me
 My Home town After Mapping Done by me :)
 So you can clearly see what a lot has been changed in Barnala Map at osm.org. Even the name of city was not displaying earlier. All thanx to my mentor Dr. H.S. Rai who gave me full support and also couraged me time to time. He provided me VGPS (for taking GPS data). And yes also to my Dad, he also supported me a lot. He covered the boundary with me in Car. Yet I am working on streets and all minor details along with some error correction if found. You can also take a look at iframe of my home town as shown below:
View Larger Map
Subscribe to:
Posts (Atom)