Wednesday, September 29, 2010

eyeOS Translation Done


EyeOS-Cloud Computing
eyeOS is an open source web desktop following the cloud computing concept that leverages collaboration and communication among users. It is mainl
y written in PHP, XML, and JavaScript. It acts as a platform for web applications written using the eyeOS Toolkit. It includes a Desktop environment with 67 applications and system utilities. It is accessible by portable devices via its mobile front end.
eyeOS is browser based operating system based on cloud computing. It can do all that jobs which a real operating system can do. One can save his data and work on-line ad can access his a
ll the data from anywhere.
eyeOS is a desruptive Desktop entirely usable fro
m a web browser. It includes some office suite and and some collaboration applications, as well as a full framework to develop new web applications as they were web applications. Its Free and Open-source so you can host you own system, keeping all your data under your own control.
Website: http://www.eyeos.org/
eyeOS in Hindi
In eyeOS 2.0 its translations in different languages will also be available. I also have deployed it in our college. I made eyeOS avialable in our college serevr during my training. And after my training I got an email from Mr. Jordi Collel (Team Leader for Translation of eyeOS). So I came in the contact with the ey
eOS developers and translated all the eyeOS in Hindi. But this translation will be available in is next release. I alone did all the translation for it in Hindi Language. I also suggest my closest friend Parveen to translate it to Punjabi. He did a great job.
Here is the link to use eyeOS at college dummy server. http://202.164.53.116/eyeos/
Just Create a new user here and use it.
and to the translation http://translate.eyeos.org/.See the following image showing the translation done by me that will be available soon to everyone.
This is the task done by me. You can clearly see the contents being displayed.d in Hindi language. So soon you will be also able to view eyeOS in Hindi. It was quite atedious job but yaa interseting too.


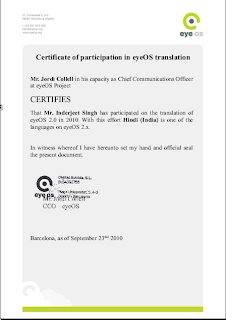
Certificate from eyeOS Developers
I also got the Certificate from the Developers of eyeOS from Barcelona(Spain) for doing this translation ion Punjabi and for taking part in opensource Project.Give a Look at my Certificate shown Below.

Friday, September 24, 2010

Barnala Map Ready At Open Street Map

I am feeling very happy to announce that Map of MY Home Town is finally ready (with just few detailing left) after two months. Indeed I took a quite much time but yet I was single person to map the whole districts with one of my student Sukhakashdeep Singh (+1 Inter arts) resident of Barnala too. He helped me a lot while collecting the GPS Data. Before I was doing my project when I made to see my Barnala Map by my mentor Dr. H.S. Rai, I was just shocked to see, not even boundary of city has been drawn earlier by anybody. From that very I decided that I will myself complete this map alone whether one should interested or not to help me. And Finally I got the result. You can clearly See What my Home town was earlier and What it is at present.

MY Home Town Before Mapping Done by me
My Home town After Mapping Done by me :)

So you can clearly see what a lot has been changed in Barnala Map at osm.org. Even the name of city was not displaying earlier. All thanx to my mentor Dr. H.S. Rai who gave me full support and also couraged me time to time. He provided me VGPS (for taking GPS data). And yes also to my Dad, he also supported me a lot. He covered the boundary with me in Car. Yet I am working on streets and all minor details along with some error correction if found. You can also take a look at iframe of my home town as shown below:

View Larger Map

Monday, September 20, 2010

Convert Your Ubuntu10.04 into a Complete MacBook's Look

Now you can change the Graphics of your Linux(Ubuntu10.04) into a Complete MacBook's Look just with some simple commands given below.Mac OS X Transformation Pack. Similar to Mac4Lin but dedicated to Ubuntu Linux. It can also be used in other OS based on Debian/GTK. Package includes all necessary system components to mimic Mac OS X appearance on Ubuntu Linux.
Important: While Running these commands you will be asked to do changes on your current working Environment.
Mac Ubuntu

Installation:


wget https://downloads.sourceforge.net/project/macbuntu/macbuntu-10.04/v2.0/Macbuntu-10.04.tar.gz -O /tmp/Macbuntu-10.04.tar.gz
tar xzvf /tmp/Macbuntu-10.04.tar.gz -C /tmp
cd /tmp/Macbuntu-10.04/ 
$ ./install.sh

Thursday, September 2, 2010

Installing GIMP Scripts

First you have to decide if you are going to make this script available for all users as a Global script or just a single user as a local script. If you don't have access to create files in the Global location then you can only install them as a local script.

Microsoft Windows and Linux use different file system structures so they require you to save the files in completely different locations. The default file locations are as follows:

Windows


  • User: Download the file to C:\Documents and settings\\.gimp-2.2\scripts
  • Global: Download the file to C:\Program Files\GIMP-2.0\share\gimp\2.0\scripts
Linux

  • User:Download the file to ~/.gimp-2.2/scripts
  • Global:Download the file to /usr/share/gimp/2.0/scripts

Where did the script go?

Often you have just installed the script and now you can't find it. There are several reasons for this and I will explain how to find the new script.

First, when GIMP starts it reads both the Global and user script locations. So if you have added the script while The GIMP was running you will not see it, yet. One solution is to close GIMP and re-open it allowing it to read and add the new script. Another is to manually tell GIMP to read the script locations while it is still running. To do this just go / Xtns / Script-Fu / Refresh scripts

Ok, GIMP has read the script where do I find it?

GIMP scripts can be placed by the author anywhere they want. The two main locations are in the main GIMP window or in the menus in the Image window.

As a general rule scripts that alter the image are placed on the image menus and ones that create a new image from scratch are placed in the menus on the main GIMP window.

Wednesday, August 25, 2010

How to turn a jpeg image into a sketch in Gimp

  1. Start gimp on your computer and load the jpeg image you'd like to work with into the gimp.
  2. Go to colors; then desaturate-average.
  3. Go to filter and select edge.
  4. Now, got to colors and select invert.
  5. You now have a sketch of your photo. Now go to colors, then levels and play with the values until you are satisfied with the intensity of the sketch.
  6. Save your image and your done!

Saturday, August 14, 2010

Activating the User's public_html Directory with userdirectory (Using Apache2 )


Create a directory (folder) called "public_html" in your home directory, with your file browser or the command below. Do NOT use the sudo command.
me@myhost$ mkdir public_html

I have found that on a simple development machine, it is easier to have your work all within your own home directory and not have to worry about permissions and folders owned by the root user. What it gets you is the ability to access your websites in your home directory by a URL in the form http://localhost/~USER_NAME. We can improve upon this with fake domains, but first things first.
There are only two commands you need to enter to activate the User Directory feature, and then one command to reload the configuration files. The last command includes an absolute path, so it doesn't matter where you execute it from. The first two "ln" commands assume you are in the directory /etc/apache2/mods-enabled. What you need to do is create two symbolic links (soft links, symlinks) in the stated directory pointing to the corresponding module in /etc/apache2/mods-available. So, if "$" is your prompt,
me@myhost$ cd /etc/apache2/mods-enabled
me@myhost$ sudo ln -s ../mods-available/userdir.conf userdir.conf
me@myhost$ sudo ln -s ../mods-available/userdir.load userdir.load
me@myhost$ sudo /etc/init.d/apache2 restart
me@myhost$ sudo gedit /etc/apache2/mods-available/php5.conf
you will see a file like the one below :


SetHandler application/x-httpd-php


SetHandler application/x-httpd-php-source

# To re-enable php in user directories comment the following lines
# (from to .) Do NOT set it to On as it
# prevents .htaccess files from disabling it.


php_admin_value engine Off


Now change it to look like the one below and then save it :


SetHandler application/x-httpd-php


SetHandler application/x-httpd-php-source

# To re-enable php in user directories comment the following lines
# (from to .) Do NOT set it to On as it
# prevents .htaccess files from disabling it.
#
#
#php_admin_value engine Off
#

#

#


Monday, August 9, 2010

Backup MySQL Database to a file

Backing up your database is a very important system administration task, and should generally be run from a cron job at scheduled intervals. We will use the mysqldump utility included with mysql to dump the contents of the database to a text file that can be easily re-imported.
Syntax:
mysqldump -h localhost -u root -pmypassword databasename > dumpfile.sql
Example:
mysqldump -h localhost -u root -p2Uad7as9 database01 > dumpfile.sql
This will give you a text file containing all the commands required to recreate the database.